Step 7: Run the Spring Web App
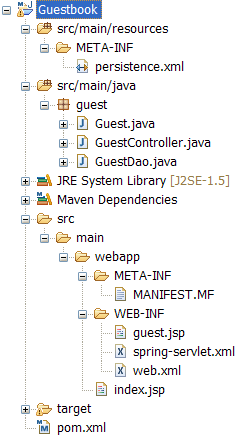
At this stage your project should have the following structure:
Use copy and paste to replace the content of the index.jsp file (which serves as the default front page) with the following redirection to the controller path:
<jsp:forward page="guest.html" />
If Tomcat 6.0 is installed as a server in your Eclipse - you can run the application now by right clicking the project node (in the [Project Explorer] window), selecting Run As > Run on Server, selecting the Tomcat 6.0 server and clicking Finish.
To install a new server check the Manually define a new server radio button (after Run As > Run on Server) and follow the instructions.
Alternatively you can run the web application using the embedded Maven Jetty plugin:
- Right click the project node and select Run As > Maven Build...
- Enter jetty:run in the Goals field and click Run.
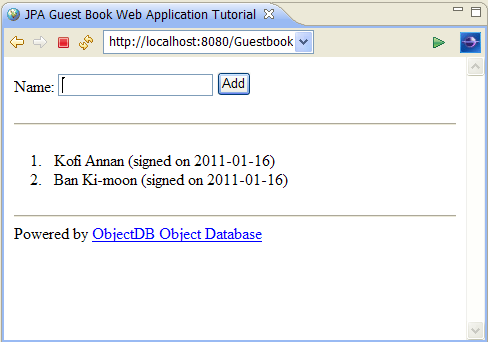
- Open your browser at http://localhost:8080/Guestbook/.
This Spring web application can also run with GlassFish 3.0.1, with a small change in the persistence.xml file - instead of RESOURCE_LOCAL you will have to specify JTA.
To enable on the fly automatic enhancement (weaving) in Tomcat it has to be run with ObjectDB as a Java agent (javaagent:objectdb.jar). When using GlassFish - on the fly enhancement (weaving) is automatically enabled without specifying a Java agent.
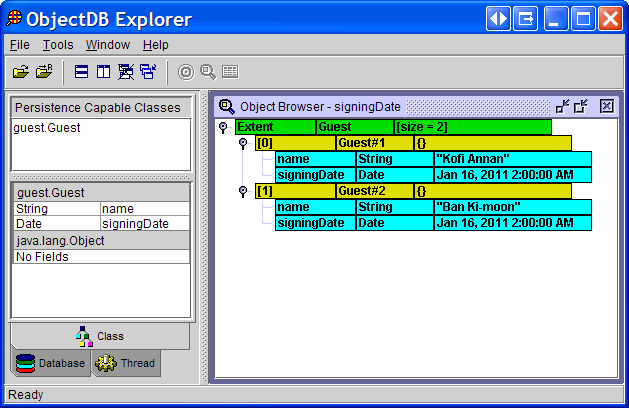
Since we are using ObjectDB in embedded mode - the database file is created under the Tomcat directory. You can stop the Tomcat server and open the database file in ObjectDB Explorer:
This is the end of the tutorial. Learn more about ObjectDB and JPA by reading the Manual.